In this opportunity we will test the Carriots platform, for a long time wanted to try it and make a tutorial and this is the moment.
Carriots is a platform that provides PaaS services for IoT and M2M projects, allows the connection of devices for data collection and construction of applications, in a few steps you can connect your devices or platforms like Arduino, Raspberry pi or ESP8266 among others.
Oficial Site: Carriots.com

In this case we will make 2 tutorials:
- We’ll tell you step by step how to create a free account.
- Communication tests with ESP8266 module temperature measurement with Carriots platform.
1. Create platform account IoT Carriots
Other similar references ..
2. Tutorial Platform IoT Carriots & ESP8266 sensor DS18B20
We will indicate how to configure carriots and of course the module ESP8266.
Specifically the ESP8266 module performs the reading of the temperature sensor DS18B20 (Onewire) and sends the value through.
This video will detail step by step the required configurations and at the end we will graph the temperature.
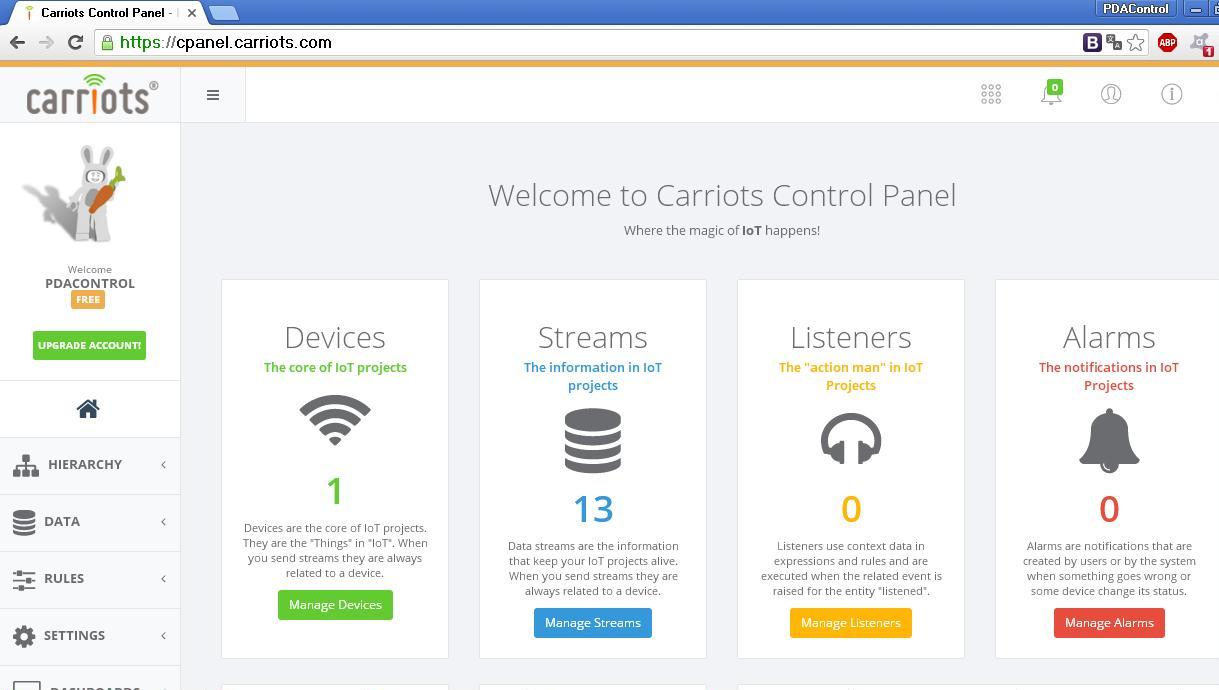
CPanel Carriots
View the count of resources and applications used by our devices.
Stream View
Viewing data received from the ESP8266.

Arduino IDE Code
You need to install the libraries in advance:
- OneWire.h
- DallasTemperature.h
#include  < OneWire.h >
#include  < DallasTemperature.h >
#include "ESP8266WiFi.h"

const char* ssid = "********";
const char* password = "*********";
const char* server = "api.carriots.com";

// Replace with your Carriots apikey
const String APIKEY = "*************************************************************"; ///your apikey
const String DEVICE = "************************"; // your deviceID

WiFiClient client;

#define ONE_WIRE_BUS 2
OneWire oneWire(ONE_WIRE_BUS);
DallasTemperature sensors(&oneWire);

void setup() {
 sensors.begin();
 Serial.begin(115200);
 delay(1000);
 // start wifi
 Serial.println();
 Serial.print("Connecting to ");
 Serial.println(ssid);
 WiFi.begin(ssid, password);
 while (WiFi.status() != WL_CONNECTED) {
 delay(500);
 Serial.print(".");
 }

 Serial.println("");
 Serial.println("WiFi connected");
 Serial.println("IP address: ");
 Serial.println(WiFi.localIP());
}
// Send data to Carriot

void sendStream()
{
 //const int httpPort = 80;
 if (client.connect(server, 80)) { // If there's a successful connection
 Serial.println(F("connected"));

 sensors.requestTemperatures();
 Serial.println(sensors.getTempCByIndex(0));
 String temperature = String(sensors.getTempCByIndex(0));

 // construct the data json
 String json = "{\"protocol\":\"v2\",\"device\":\"" + DEVICE + "\",\"at\":\"now\",\"data\":{\"temperature\":\"" + temperature + "\"}}";

 // Make an HTTP request
 client.println("POST /streams HTTP/1.1");
 client.println("Host: api.carriots.com");
 client.println("Accept: application/json");
 client.println("User-Agent: Arduino-Carriots");
 client.println("Content-Type: application/json");
 client.print("carriots.apikey: ");
 client.println(APIKEY);
 client.print("Content-Length: ");
 int thisLength = json.length();
 client.println(thisLength);
 client.println("Connection: close");
 client.println();
 client.println(json);


 while(client.available()){
 String line = client.readStringUntil('\r');
 Serial.print(line);
 }


 }
 else {
 // If server connection failed:
 Serial.println(F("connection failed"));
 }
}
void loop() {

 Serial.println(F("Enviando...."));
 sendStream();
 delay(5000);
}
Materials
Conclusions
The DS18B20 sensor and the ESP8266 NodeMCU module are a good combination for temperature measurement although it works properly with Arduino and Raspberry pi without complications.
We have tested a great variety of platforms of this type and Carriots is a very good tool that provides complete services for the analysis of data, we can exalt the following characteristics:
Gerarchy, allows you to organize your application in a way that allows expansion without affecting previous configurations
Listeners, which are listening rules to perform control.
Alarm, you can create notifications of variables and device states.
Its api allows without any complication to connect all kinds of devices and programming languages available, does not require extra libraries in the case of Esp8266 and Arduino IDE for connection.
References
Youtube Channel
PDAControl