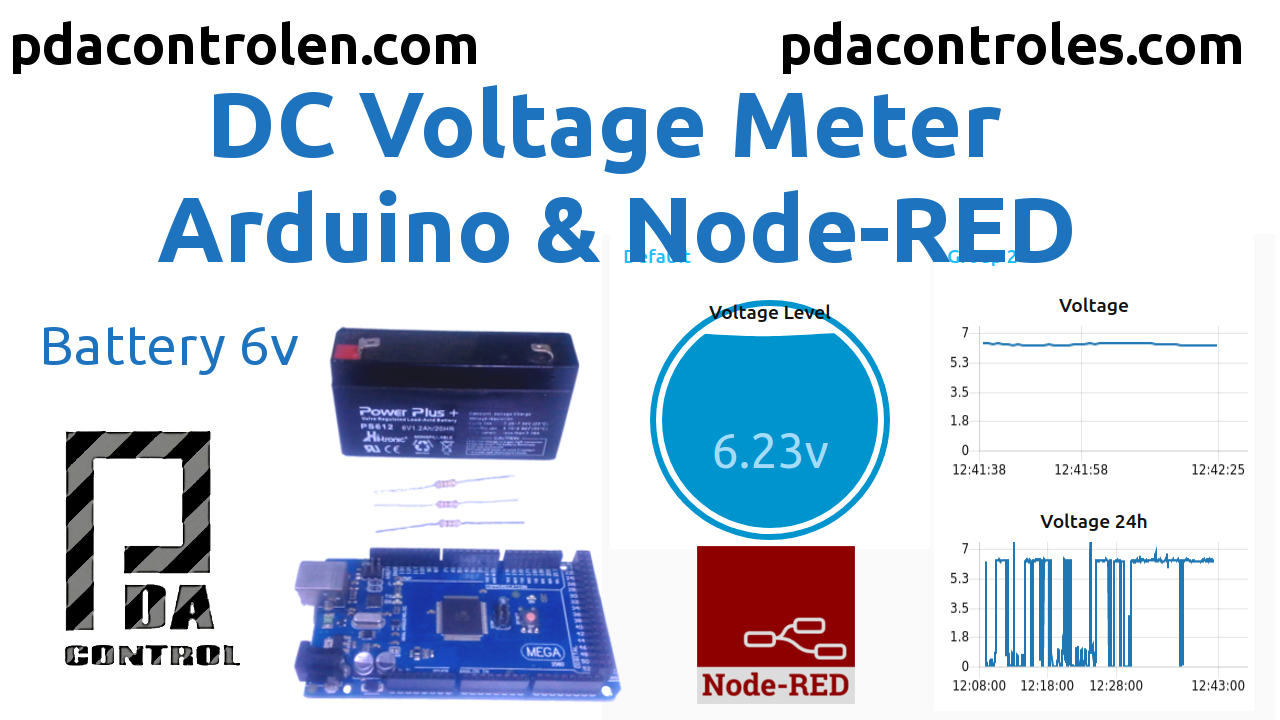
There are a lot of tutorials DC voltage measurement with Arduino, in this case I found a tutorial that I consider the best functional method to measure DC without requiring input values of resistance, only requires some resistance and a multimeter, In next tutorials we will start with solar panels and we need to measure VDC over long periods.
The code was taken from startingelectronics.org of the article Measuring DC Voltage using Arduino thanks for the great contribution.
Source: Measuring DC Voltage using Arduino
We made some modifications but added a visualization and the result was very good !!
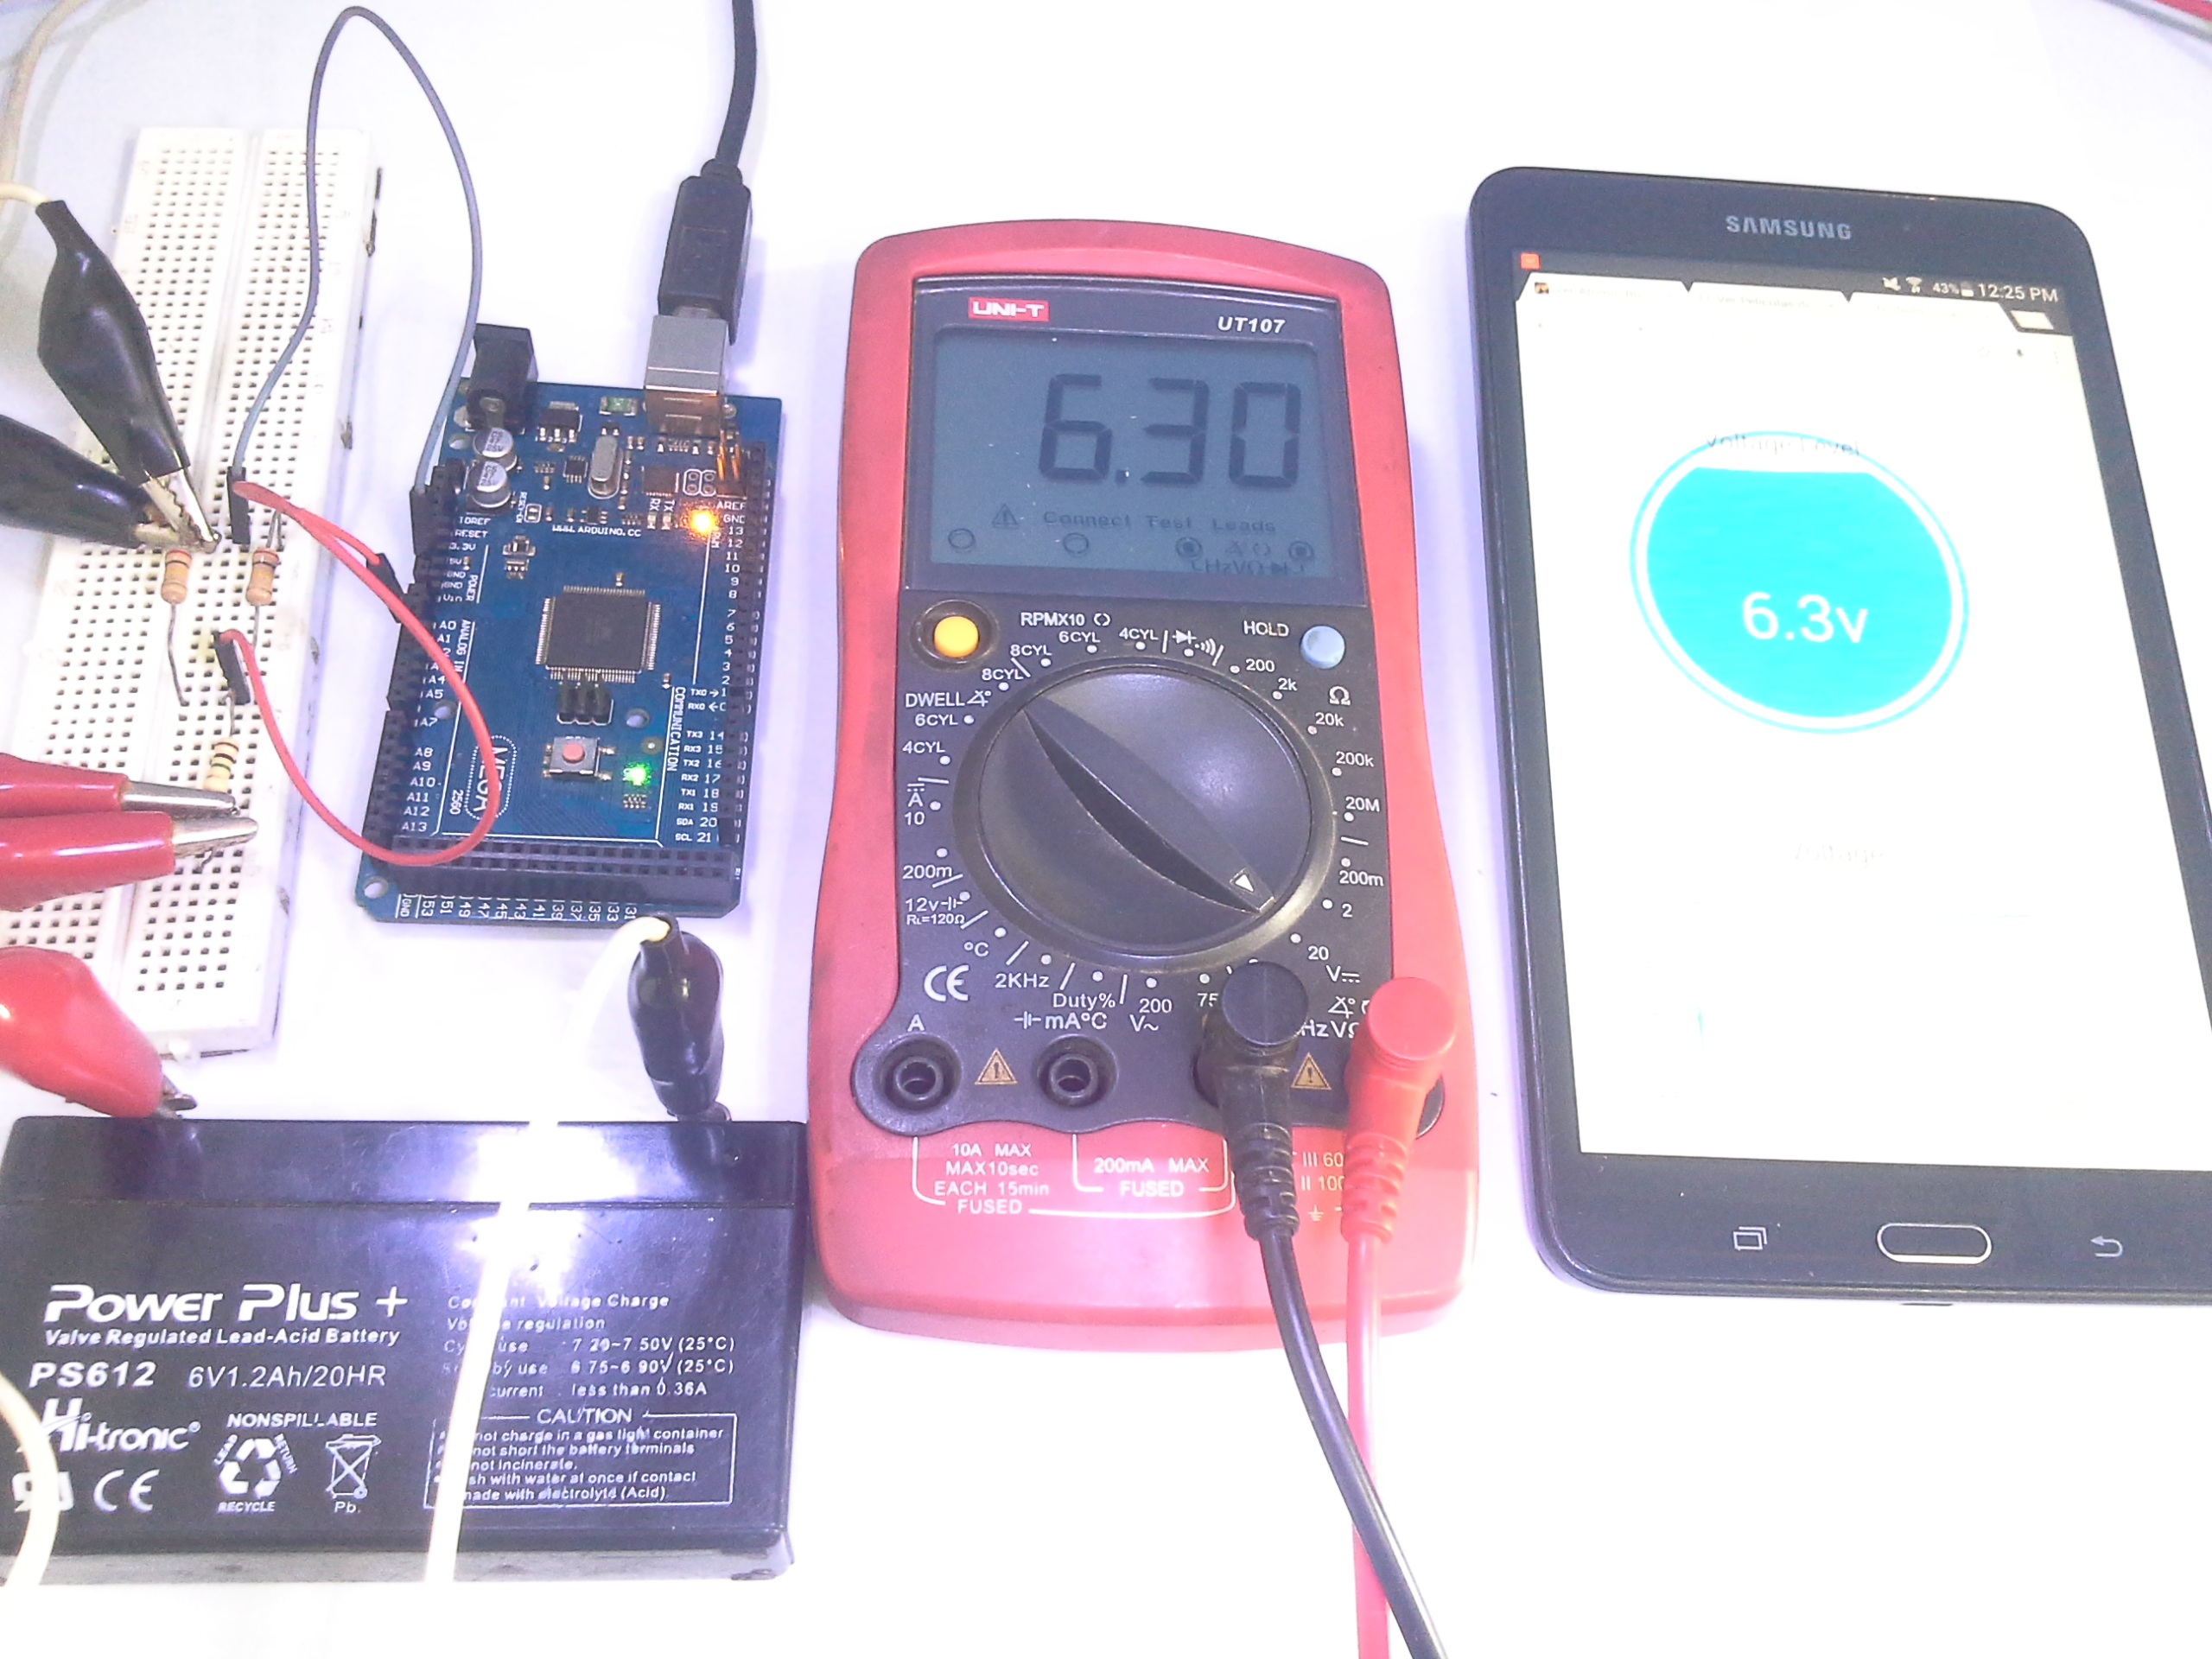
Our arduino measures the voltage in the battery and transmits via serial to Node-RED.
Tutorials: recommended Emoncms
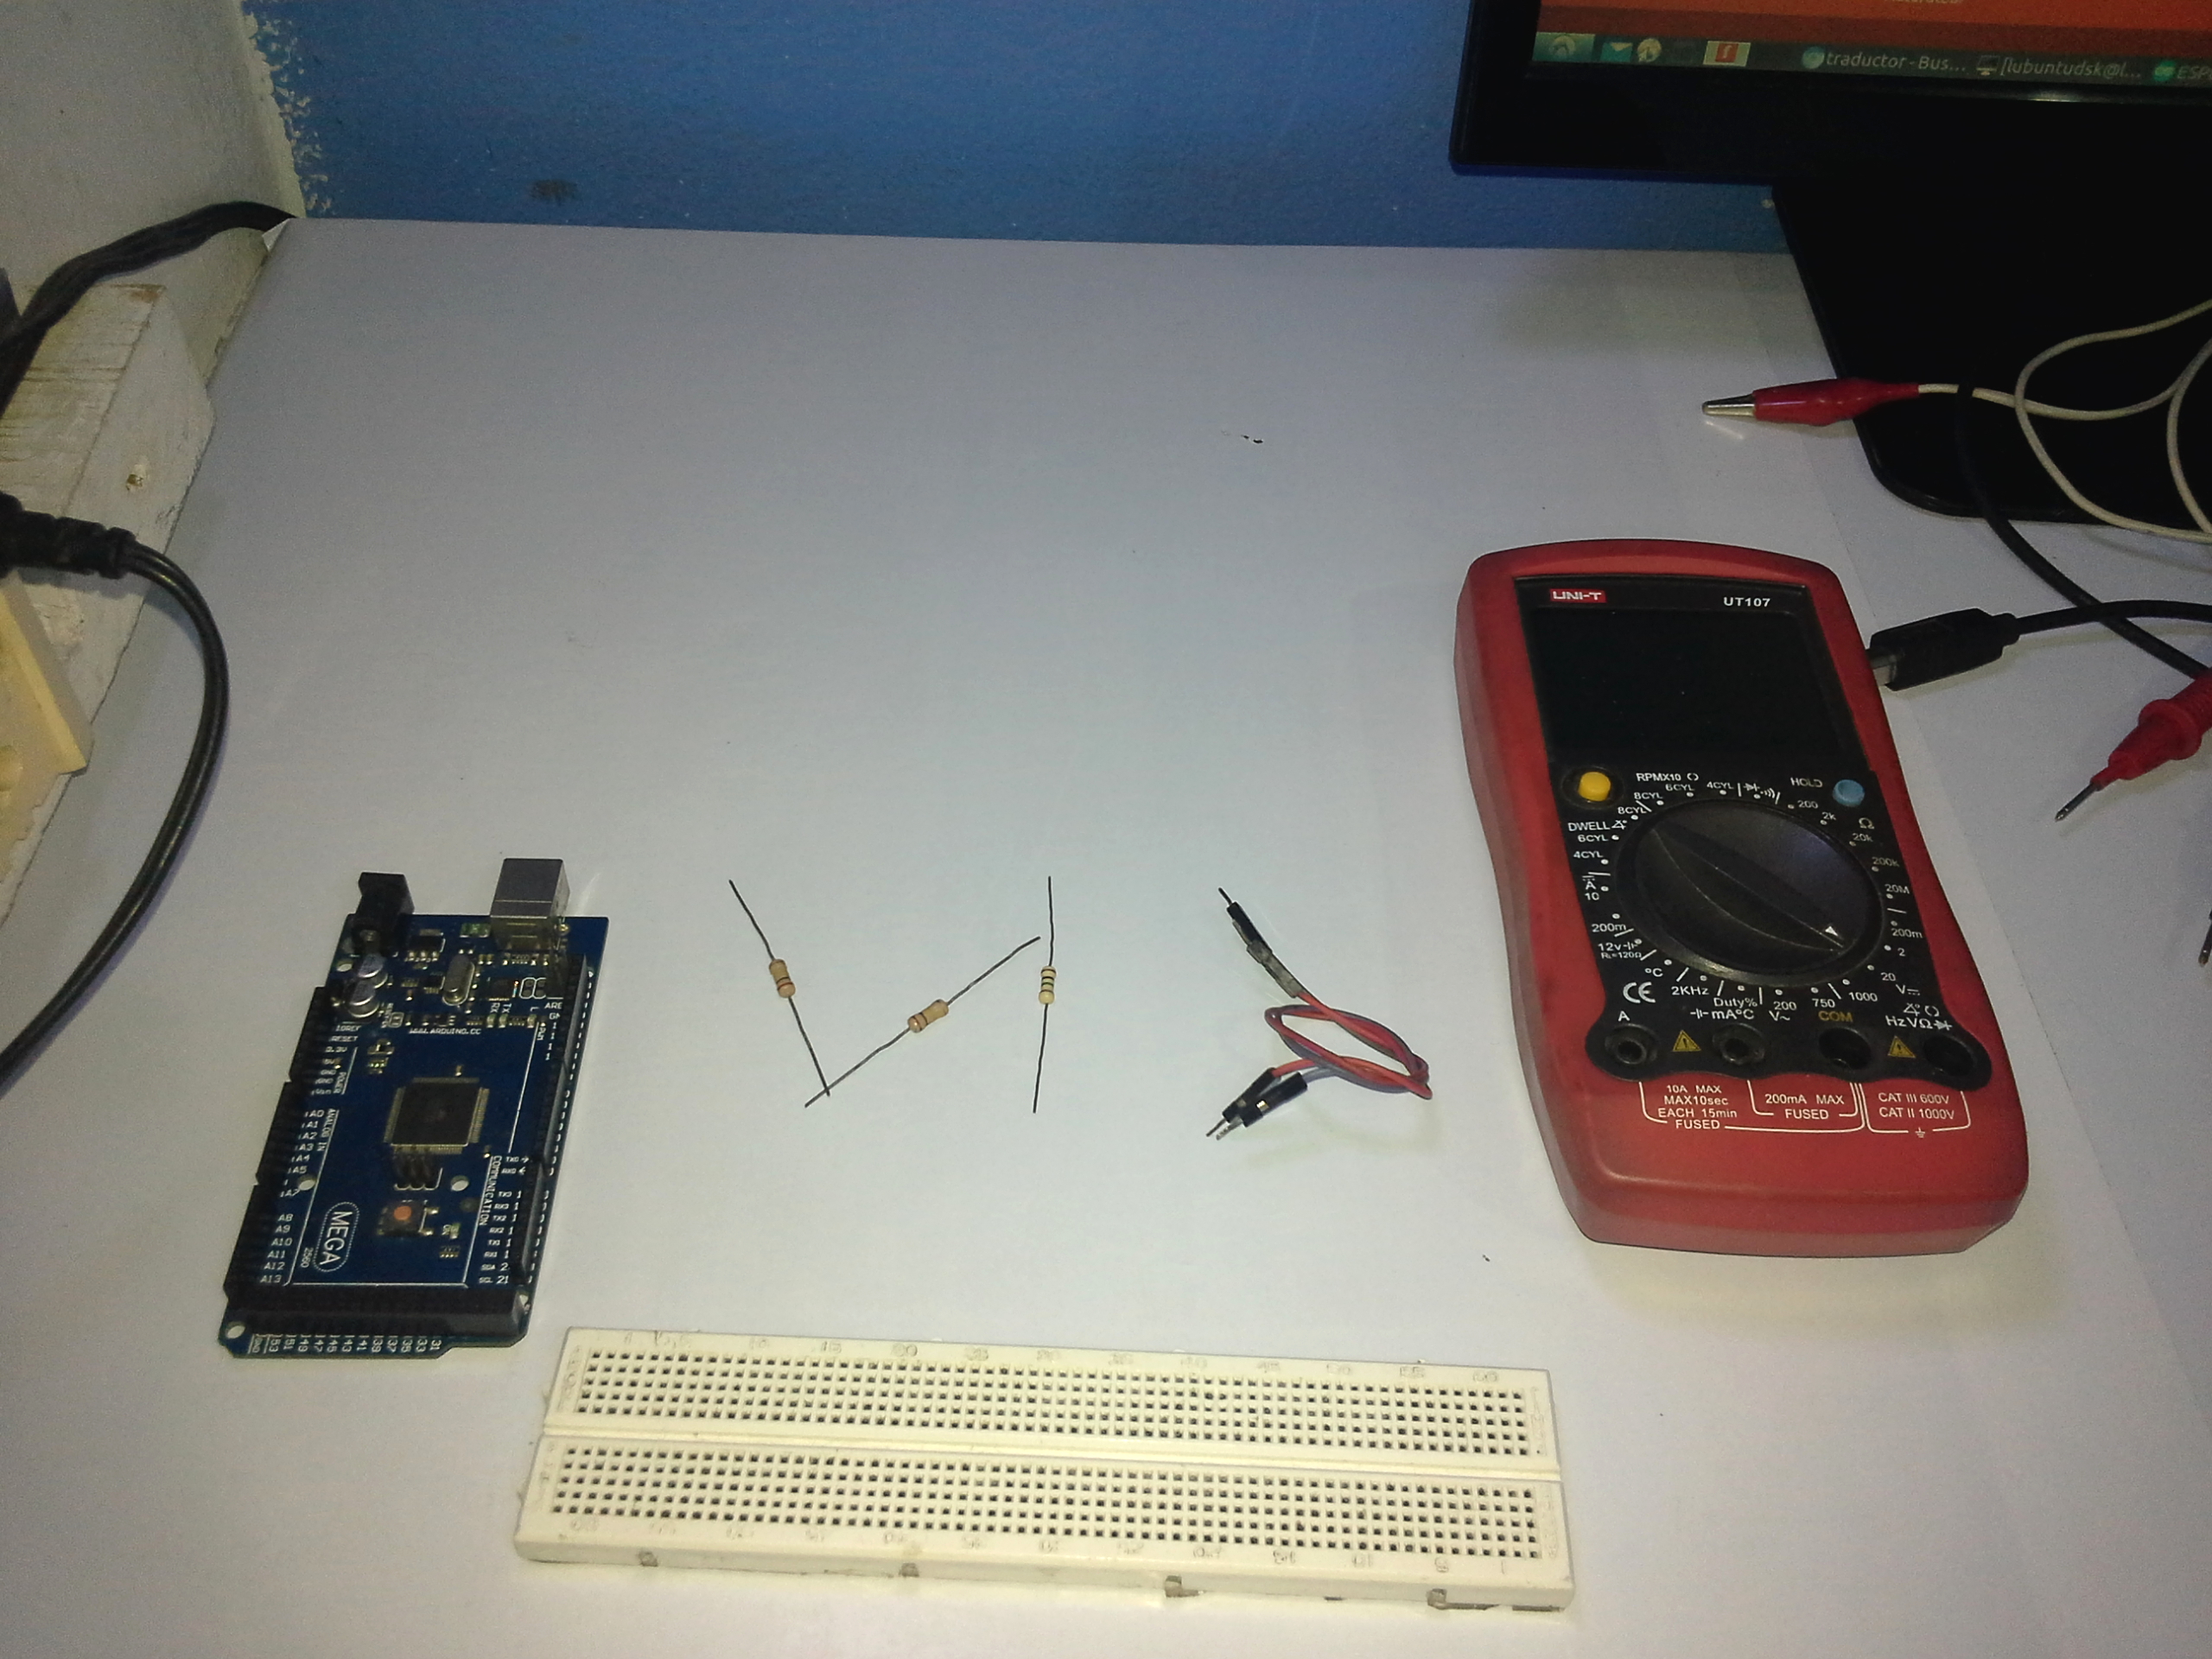
Materials
1 Resistance 1MOhm, I recommend to 1% tolerance.
1 Resistance 100K or 2 of 200K in parallel, I recommend to 1% tolerance.
1 Multimeter
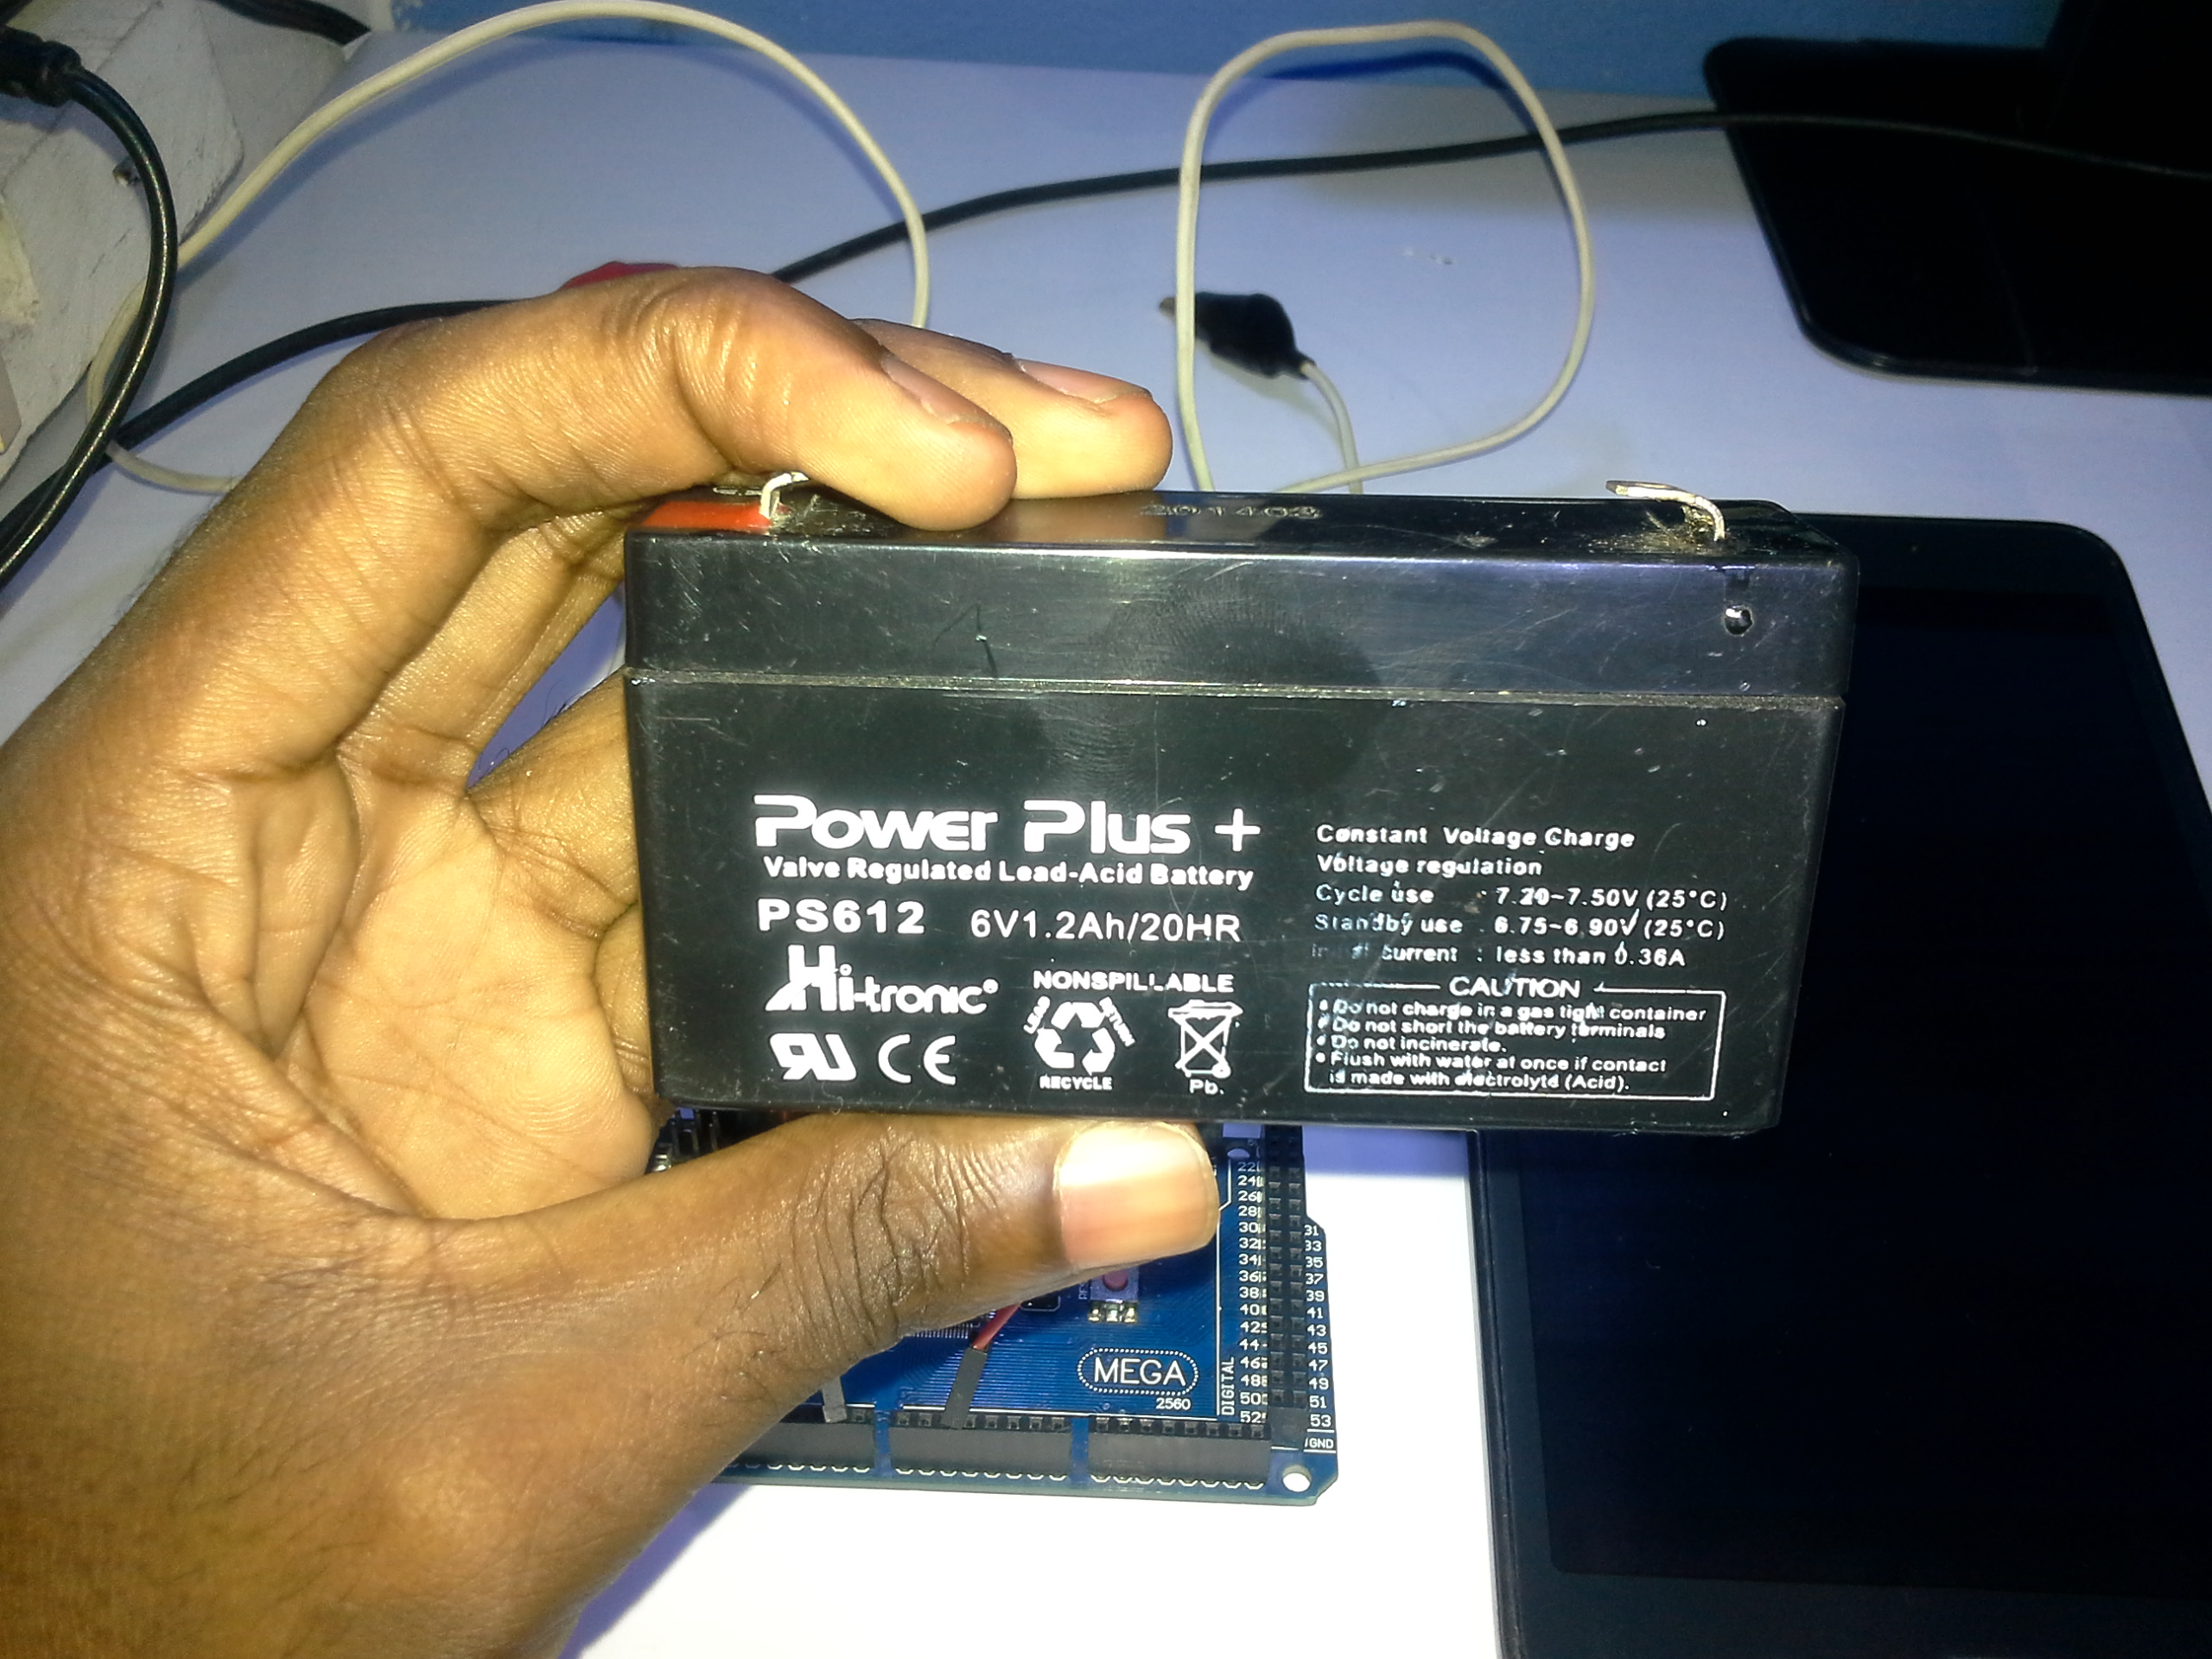
We will measure: Acid Battery 6V 1.2Ah
Full Video Explained
Functioning
Based on the method of measurement of the multimeter, which uses a great resistance to measure voltage and that the measuring instrument does not affect the measurement in the circuit.
Since the ADC of Arduino Mega 2560 R3 in this case allows maximum 5v, has been used voltage divider between 1MOhm and 100k.
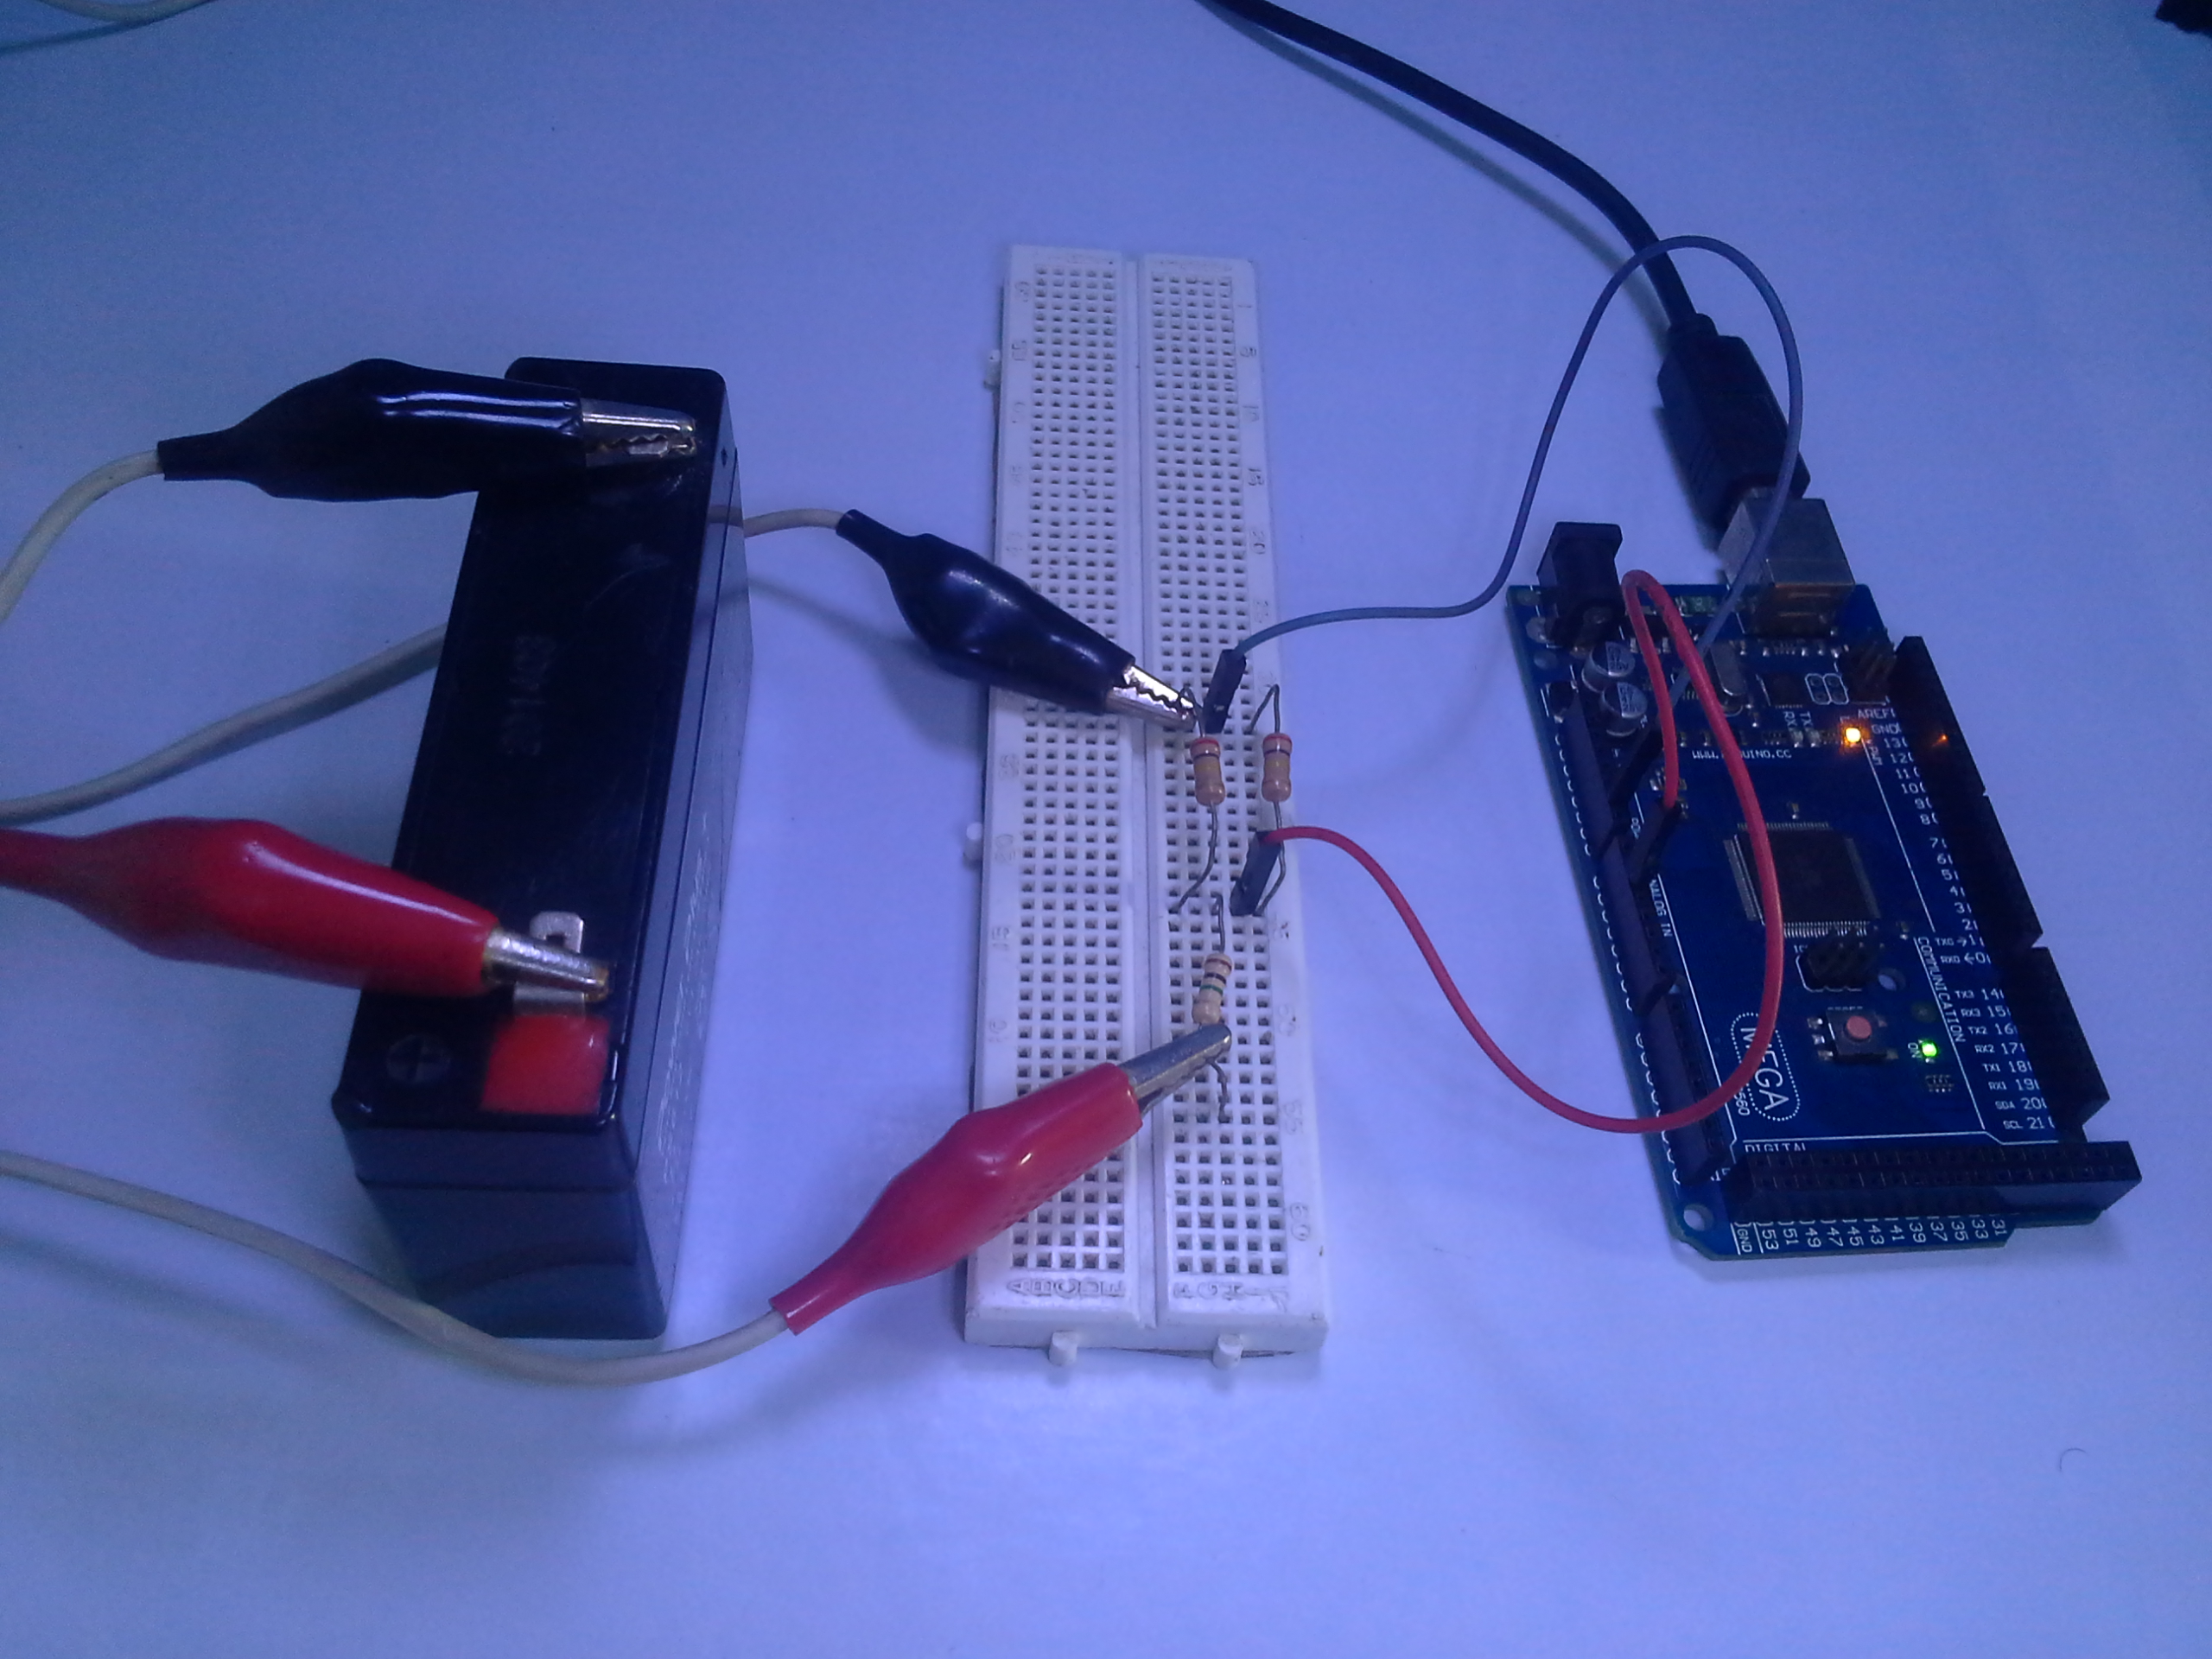
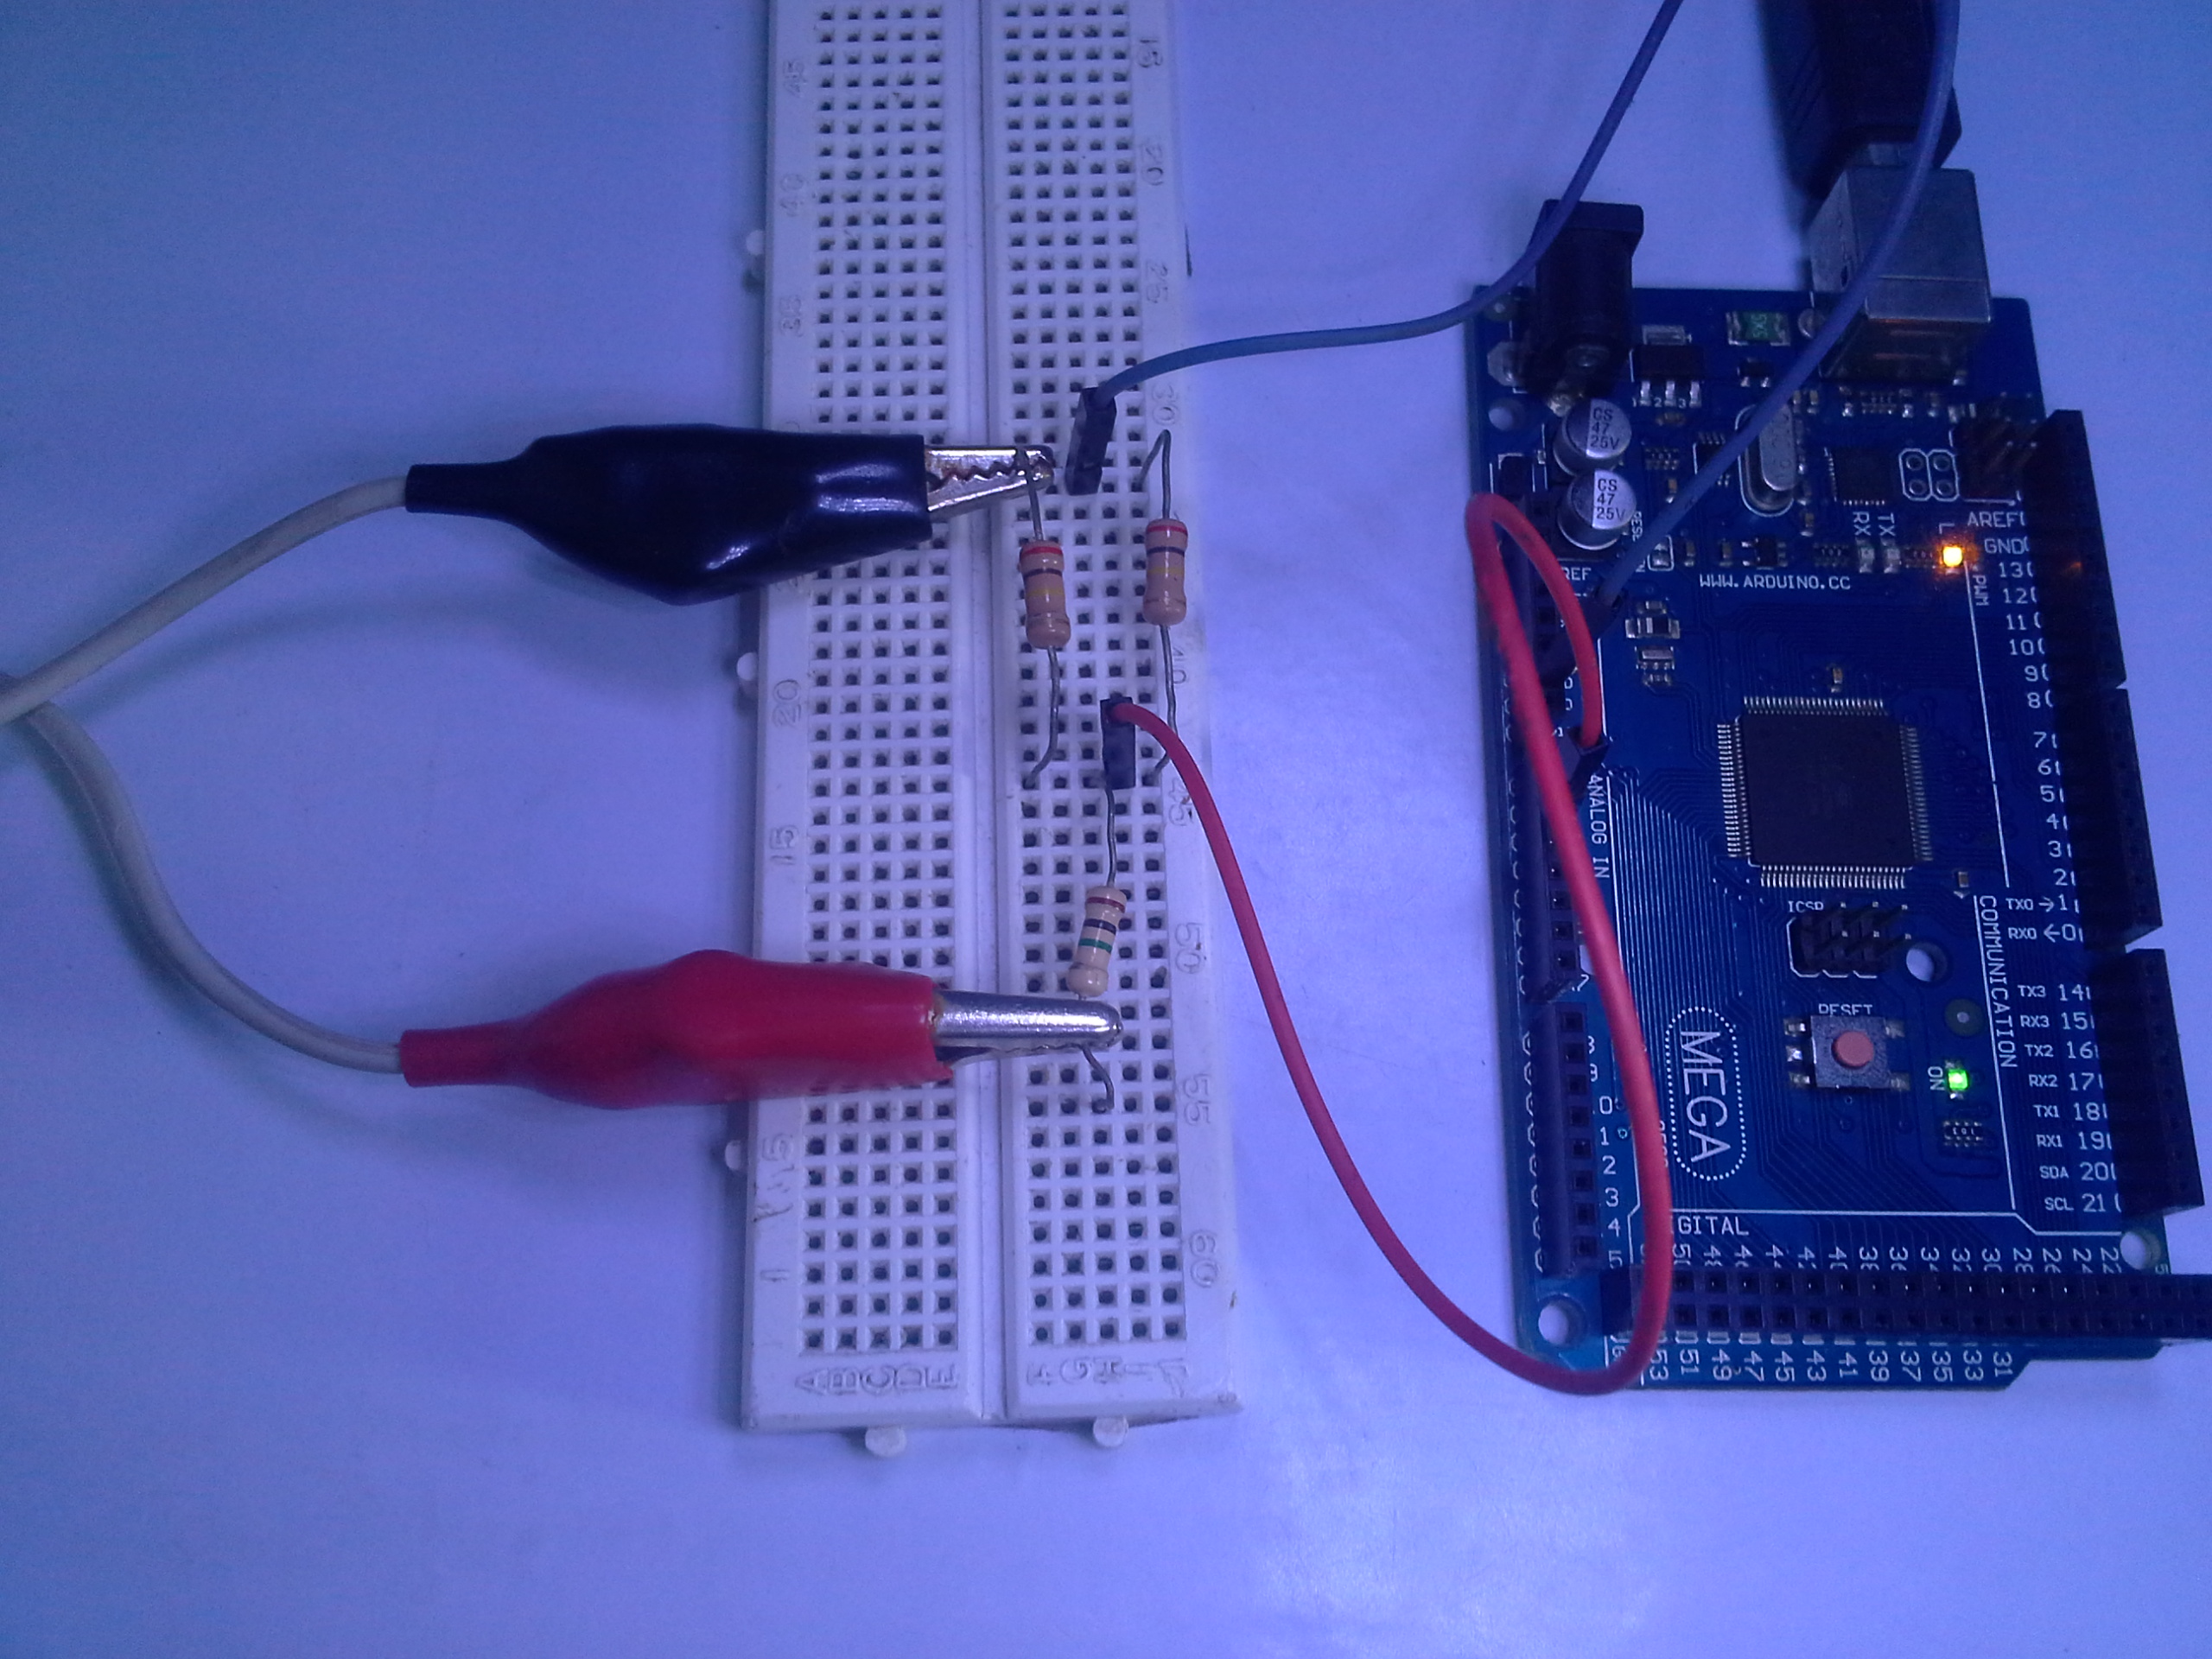
Connections
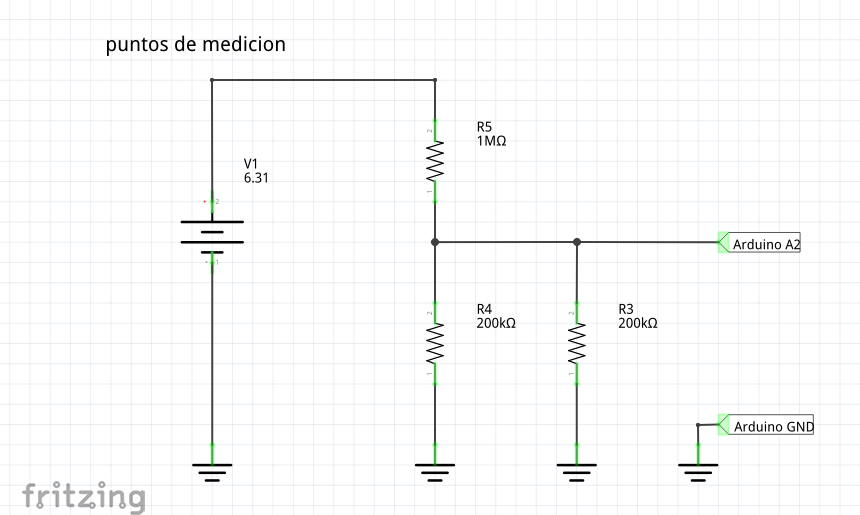
Mounting
Note: Respect the polarities of the circuit, in this case of bad connection to the battery would damage the ADC arduino.
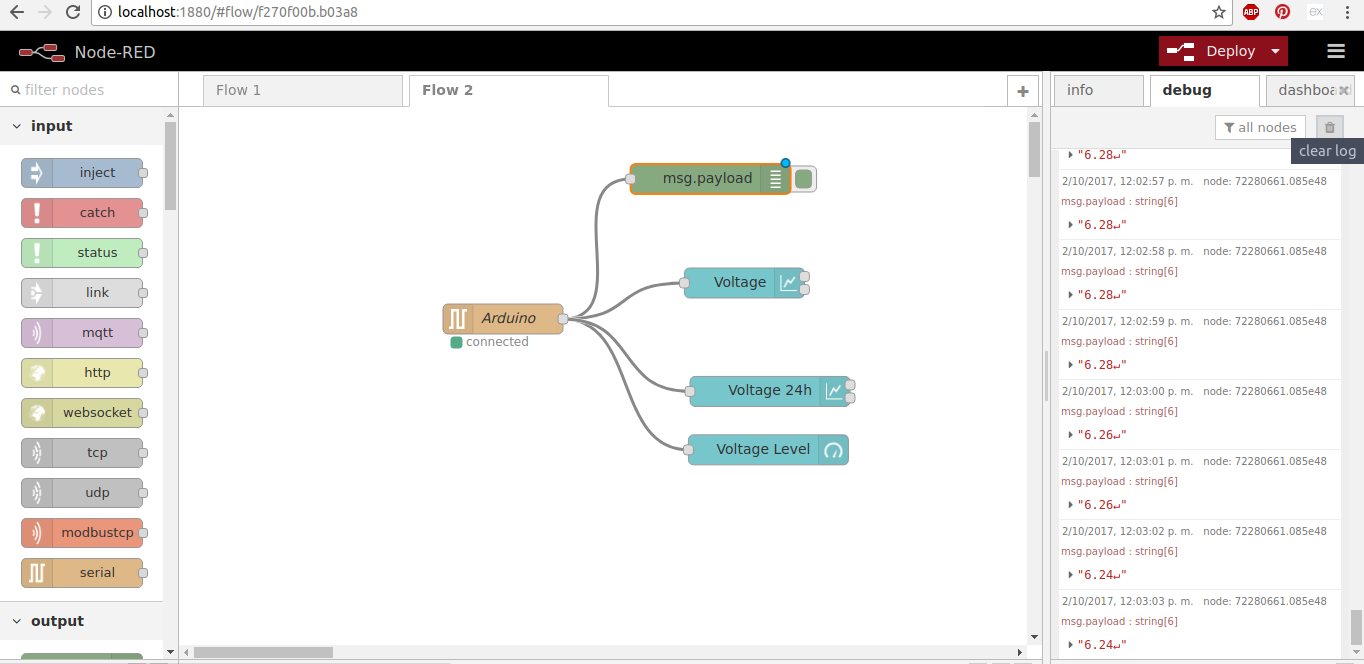
Node-RED
Since this time we will perform a test at the local network, the platform par excellence for testing in “real time” and view Node-Red data, dragging nodes and connecting will have a fast monitoring application,
Tutorial Recommended Node-RED
We will use the Nodes:
- Node Serial ports, these will allow point-to-point communication via serial Arduino PC (Node-RED).
- Node-RED Nodes Dashboard, Allows a variety of Widget nodes to create spectacular views.
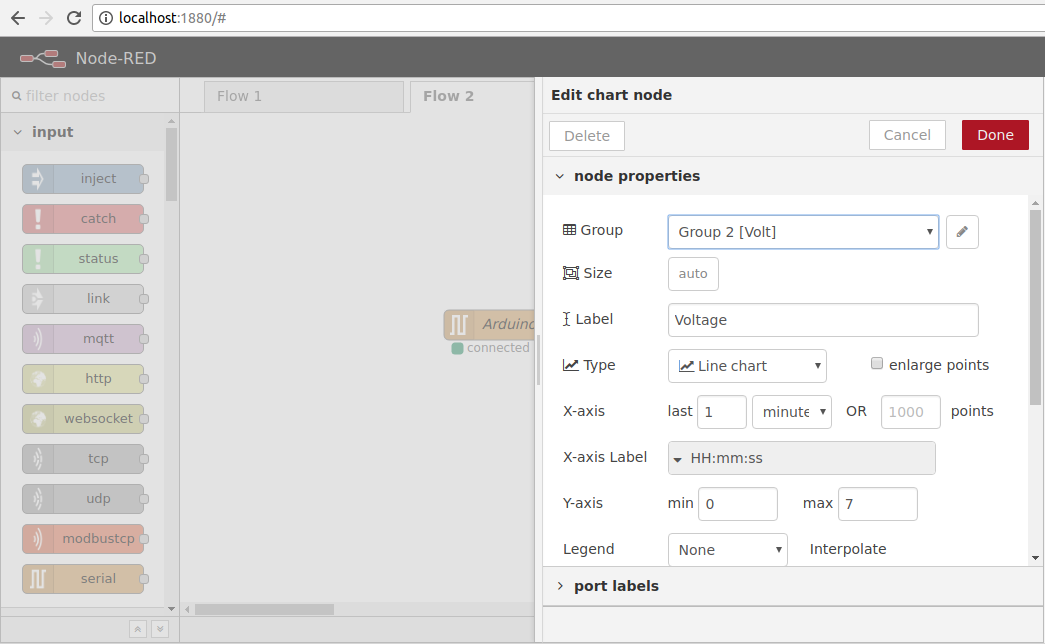
Configuration Node chart (Node-RED Dashboard)
With a few configurations we can create a graph to visualize in our data.
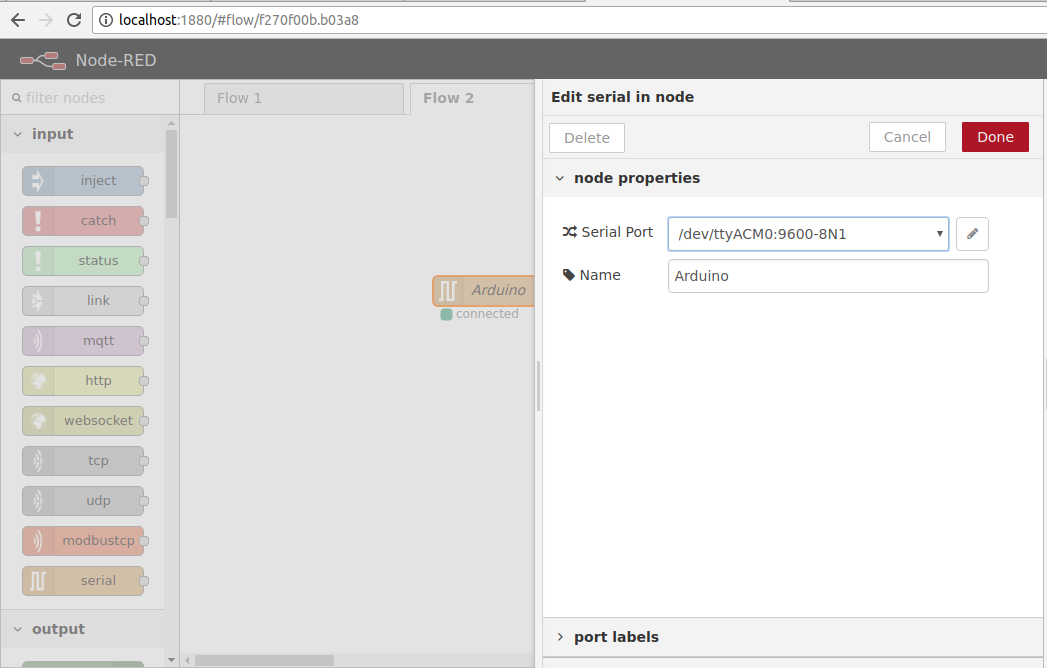
Configuration Serial Port Node (Serial Port)
With a few configurations we can receive serial data easily, configuring the associated port.
In my case serial port in Arduino MEGA 2560 R3 Linux: ACM0
Speed 9600 Bauds 8bits None 1bit
Tutorial Recommended: Enable Serial Ports on Linux
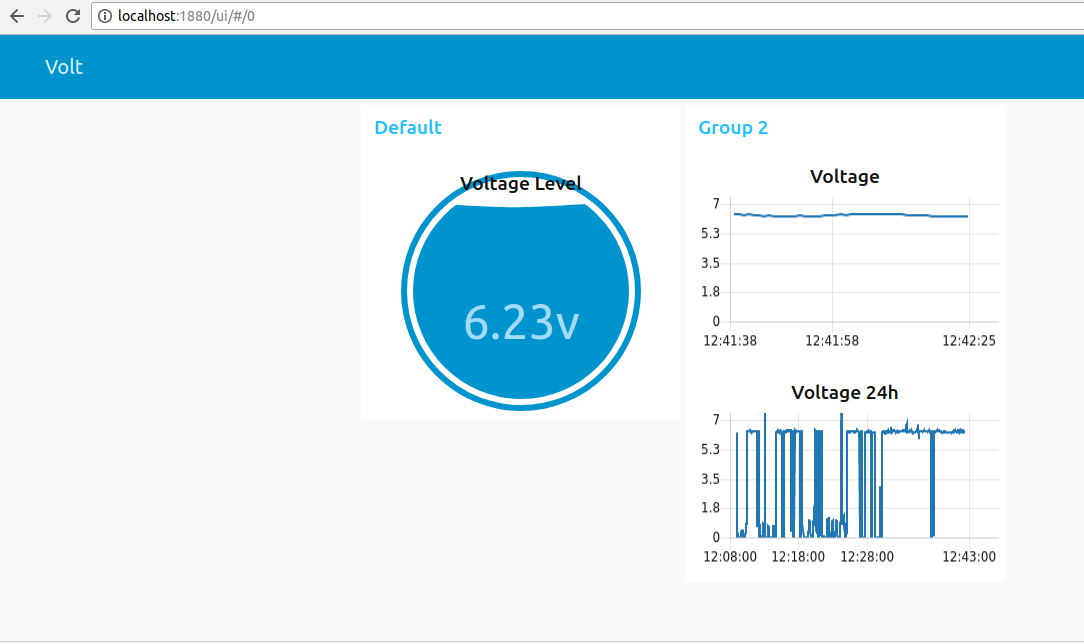
Node-RED Dashboard
We have used these nodes in a variety of previous applications, allowing not only to monitor and also control, in this case we have used the Chart and Gauge widgets.
It allows to display in “real time” from PC or portable device connected to the local network.

Arduino IDE Code
Note: Downloads at the end of the post
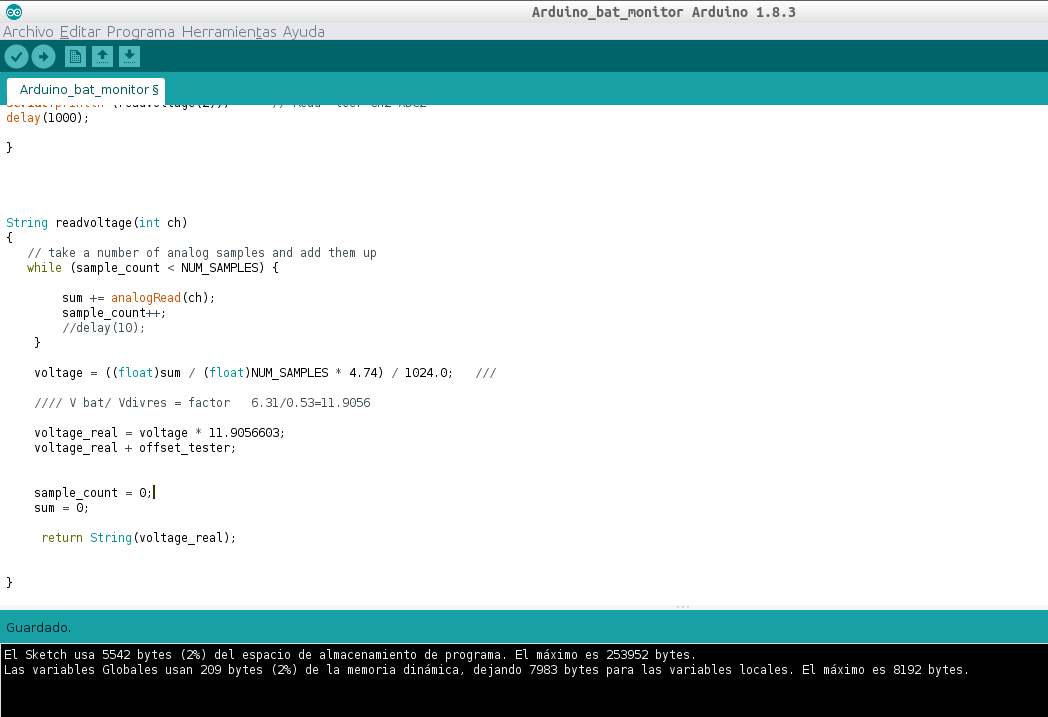
Technically the code does the following:
1 Take 10 samples of the ADC channel value.
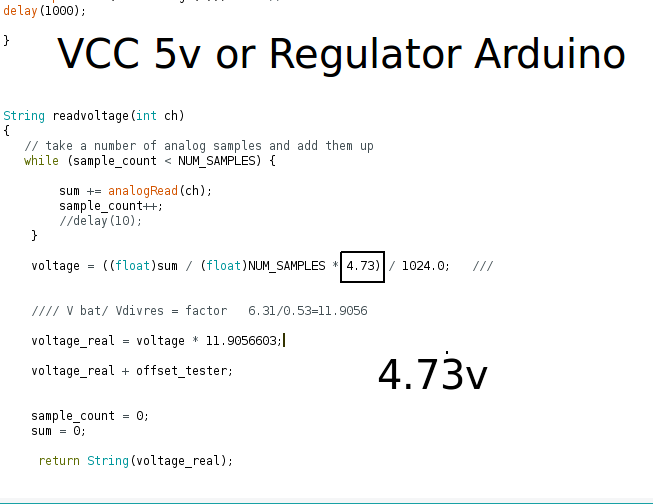
2 Calculate the voltage taking into account a reference value which is the supply voltage 4.74 in my case with the multimeter I have made the measurement.
3 The previous result voltage is multiplied by a factor, which is determined by calculating the next calibration.
Calibration
For the measurement to be correct it is recommended to perform the calibration using a multimeter and take the following measurements and modify the values in the Arduino IDE code.
1- Measure voltage of pin + 5v or the output Regulator the Arduino MEGA 2560 in my case the multimeter indicates 4.73v.
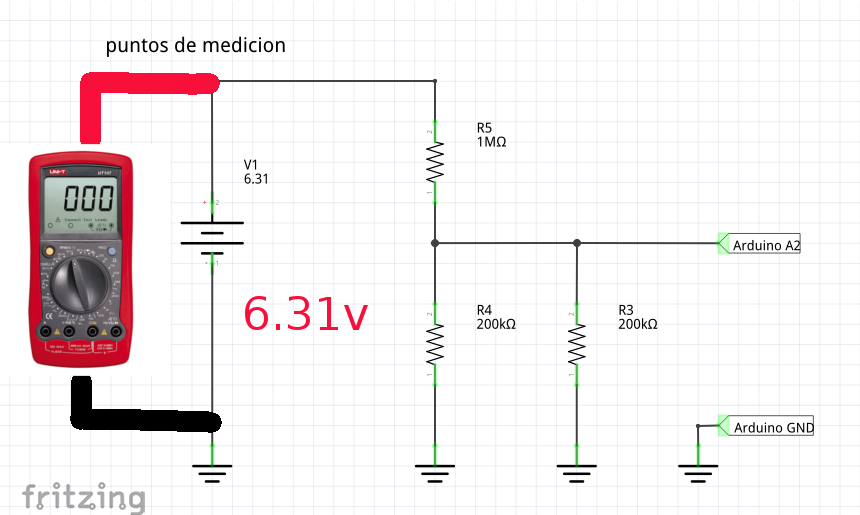
2. Measure voltage of the battery, which will be our reference in my case the multimeter indicates 6.31v.
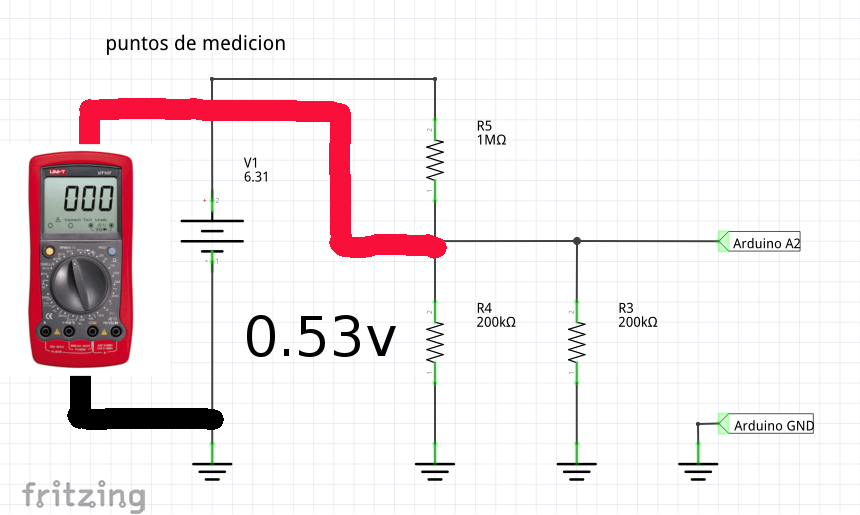
3. Measure in voltage divider or technically at the input of the arduino ADC in my case the multimeter indicates 0.53v or 0.56v
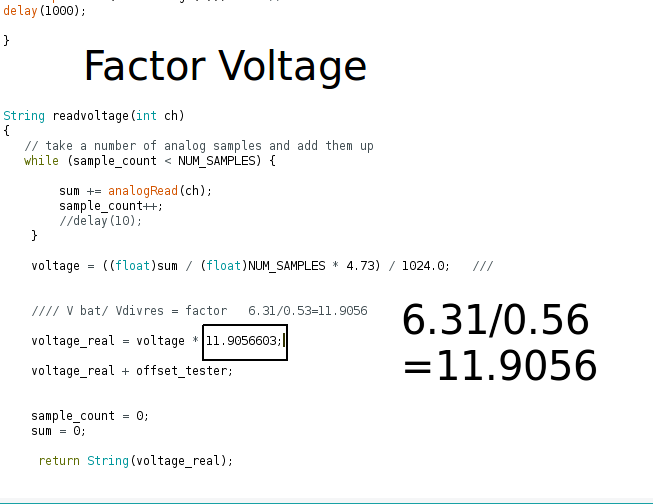
4.First carry out with the previous 2 values the following calculation of the voltage factor.
CALCULATION 6.31 /0.56= 11.9056
factor 11.9056
- edit the values to the Arduino IDE code, with your own measurements and ready.
- we add an offset_tester variable in case of adjusting +/- a little the measurement, optional.
Conclusions and Recommendations
They would say that it is impossible but for a long time look for a tutorial to measure DC Voltage in an efficient and better manner supported in code and especially functional thanks to startingelectronics.org for this contribution.
In most tutorials, you need to enter the value of the resistors, and their versions are not very useful for measurements in slightly more realistic applications or in real projects.
Since in future tutorials we will use a solar panel 10w this measurement application is perfect for those cases.
I consider that one of the advantages this method will not affect the measurement given the high impedance similar to the multimeters.
Note: in Measuring DC Voltage using Arduino ring DC Voltage using Arduino it is mentioned that this circuit allows maximum measurements up to 50 VDC, I do not guarantee it since I have not tried it very carefully and I guess with resistances of 1w maybe.
Recommendation: In this case I used 5% tolerance and the result was good but if better measurement or pressure is required use resistance 1% tolerance.
Where to Buy Arduino
Downloads
References
Measuring DC Voltage using Arduino
Node-RED Tutorials